| |
clearString neatComponents
| |
|
clearString neatComponents Inserting Images |
| Application Development | ||
Inserting Images | ||

To upload a picture:
- In the Text Editor place the cursor where you want the image
- Click the
.png) Image Tool Icon.
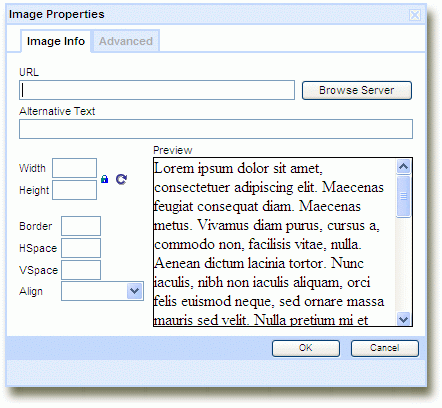
Image Tool Icon. - The Image dialog will be shown:
- Click 'Browse Server ...'
The File Manager dialog will be shown: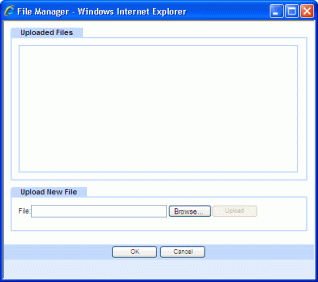
This shows all the files that have already been uploaded onto the server for this particular page. - If the image is listed, select it and proceed to step 6, otherwise:
The upload dialog allows you to drag files, images and documents, etc from the local machine directly into the uploaded files area shown above. Zipped files can be stored as zips for redistribution or expanded for immediate use.
Otherwise, click Browse, and select the file to upload from your local file system.
Images should be already resized to their finished size before uploading.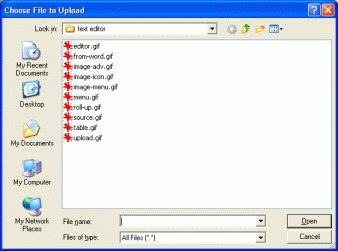
The file will be uploaded, and shown highlighted in the File Manager- Click OK
The Image dialog will reappear, with the path to the image on the server now filled in. - Adjust any other settings required in this dialog:
Set the 'HSpace' and 'VSpace' to give padding around the image - say 10 (pixels)
Set the 'Align' to either Right or Left (of the insertion point or cursor location)
Set 'Border' to '0' if the image is also a link to stop the browser placing a blue border around it. - Click OK to return to the Text Editor
Image properties Advanced-tab
The image properties Advanced-tab gives easy access to advanced styling and effects that will work in all current mainstream browsers.
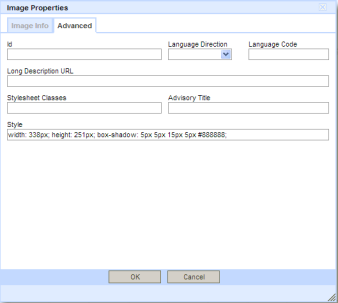
So for example: you can add a drop shadow as shown above.
Selecting the Style-entry and appending:
box-shadow: rgb(136, 136, 136) 5px 5px 15px 5px; or the equivalent hex-value
box-shadow: 5px 5px 15px 2px #aaaaaa;
will add a drop shadow to an image on the page or surface.
Copyright © 2026 Enstar Systems Inc. All rights reserved |