| |
clearString neatComponents
| |
|
clearString neatComponents Installing your download |
| How-to Resources | ||
Installing your download | ||
Installing your download
The installation process is straightforward and should only take a few minutes.
You can install onto either a Local Machine, a Virtual Machine or onto a remotely hosted server.
The actual installation process is the same.
Installation method
When you click the download link, Windows will open the 'File Download' dialog.
Click the [Save] button and save the file.

When the download is complete, click the [Run] button, and the neatComponents Setup Wizard will start.
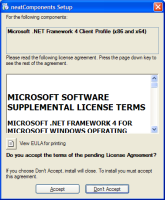 Microsoft .NET
neatComponents uses some features of the .NET Framework. If you do not have a current version already installed it will be downloaded and installed automatically.
You will see a license agreement similar to the one shown here.
Click the 'Accept' button. Installing the files may take a few minutes.
Running the Installer
Install neatComponents into the default location, and follow the wizard until the Installation is complete.
You will need to provide your Name and Organization, and enter the Installation Id.
 You can obtain an Installation ID here if you have not already got one.
The wizard will now finish the installation process. 
During the installation process your new neatComponents will automatically contact the license server and confirm your license.
Troubleshooting
If you see a message: 'Sorry, neatComponents cannot install ...' that simply means that you need to turn-on some Windows features - it is explained here.
When the installation completes, click the [Close] button,
and you will see the neatComponents 'Server Manager' for your new Installation.
Congratulations - you have successfully installed neatComponents.
Setting up access
If you need assitance in accessing your neatComponents server, or websites that you have created see this section:
Setting up access
Copyright © 2026 Enstar Systems Inc. All rights reserved |