| |
clearString neatComponents
| |
|
clearString neatComponents Using Amazon AWS |
| Installing | ||
Using Amazon AWS | ||
You need a Windows machine to install onto
If you don't have a clean? Windows machine available, then for testing, trialling and general applications we recommend installing neatComponents onto a Cloud Machine.
Why Windows?
Discover why the neatComponents server itself only installs onto Windows. Read more...
Linux and Mac Users![]()
![]()
This is also the recommended method if you are a Mac or Linux shop without access to a Windows machine. Remember - once installed you continue to develop your applications using simply your favorite web browser on any platform .
HIPAA & PCI DSS Compliance

neatComponents makes it possible to build HIPAA or PCI compliant applications using the Amazon EC2 Cloud. See note below...
Read more at Amazon Web Services Cloud Compliance
Important:
If you develop an application in a temporary environment you will be able to easily export it and transfer it so your work is not lost.
Read about app/site export here...
Working with a Cloud Server - using Amazon Web Services
neatComponents can be easily and inexpensively (pricing...) installed onto an Amazon Web Services AWS EC2 Instance following the normal neatComponents installation procedure. Here are step by step instructions for creating your own Windows server and then installing neatComponents.
We provide detailed instructions for using AWS. There are alternative Cloud suppliers.
The same general principles apply. In each case simply get a W2012R2 or 2016 base edition without any 'database' package.
First
Create a Windows 2016 Server (or more recent) Instance: Sign up here...
Next
Once you have created your account with Amazon you open the Amazon EC2 console
Then use the Wizard
The whole process is managed by a wizard - and you only need specify a few options.
Choose a region where you want the server located, using the dropdown at top left, and then click the 'Launch Instance' button to access the AWS wizard to create the actual server instance.
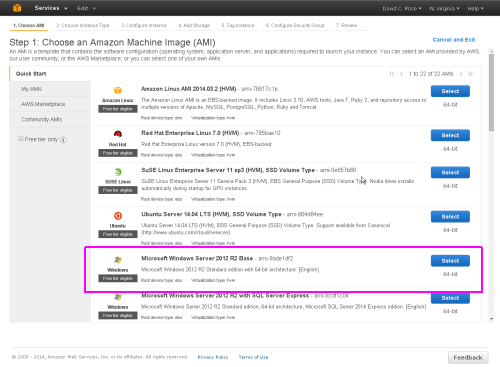
Initially, you should select a Microsoft Windows Server 2012 R2 Base instance.
At the 'Instance Details' option you should select: Instance Type = Medium (t3.medium, 3.75 GB)
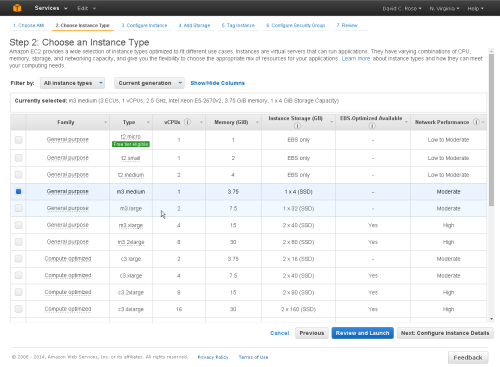
Tip:
The 'Micro' option is too light-weight and slow for practical use.
You can choose any of the other available Instance sizes.
We suggest a Medium for general trial purposes.
You can later change the Instance Type from the AWS Management Console if you wish to.
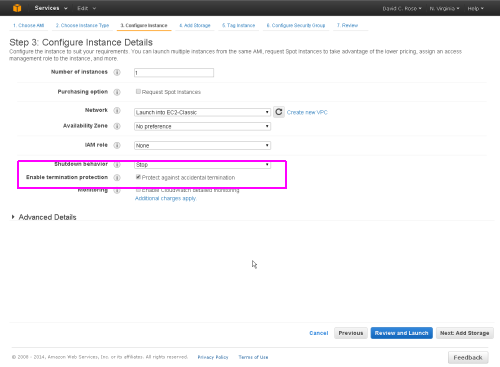
On the next screen, under Configure Instance Details, select the 'Termination Protection' checkbox and leave the other settings at the suggested defaults.
Add Storage
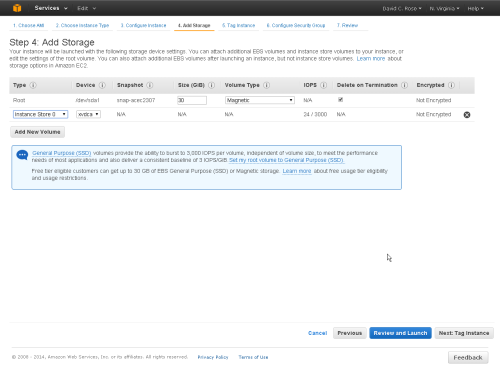
Accept the default values given for Storage. Note that by default EC2 Storage is not encrypted. If you need Encrypted storage you can convert to it later as explained below.
Step 5 - Set a Tag
At the next screen you can add a 'tag' to the Instance, so you can recognize it easily in the Console. Leave the 'Key' value at the default 'Name' and in the 'Value' box enter 'neatComponents Install' or whatever name you wish to call this Instance.
Step 6 - Security Group - Configure Firewall
It is very important to configure the EC2 firewall to allow HTTP and HTTPS traffic from anywhere.
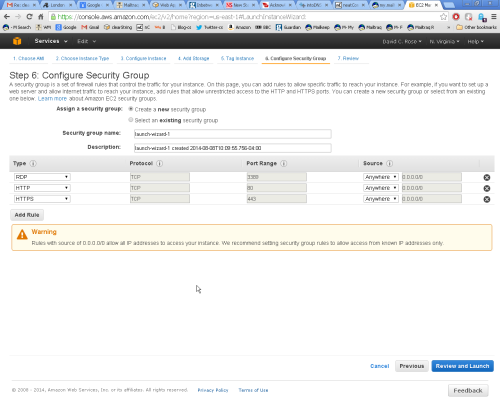

At the next screen select 'Create a new Security Group', with Group Name = nC and Group Description = HTTP & HTTPS
Create each rule by selecting from the 'Add Rule' drop-down selector, first HTTP - then click 'Add Rule', next select HTTPS from the drop-down and click 'Add Rule'. When you are done the display should look like the above.
3389 (RDP) should be pre-selected. If not add it at this stage, or later when prompted by the 'Connect' option.
Tips:
If necessary you can get back to these settings later by selecting 'Security Groups'
from the Navigation (left-column) menu of your AWS Console.
You will see warnings that say 0.0.0.0/0 allows access from anywhere.
'Anywhere' is correct for public web applications.
We suggest you do not restrict RDP access at this stage to allow for Support,
although you may choose to do so later.
Click the Review and Launch button.
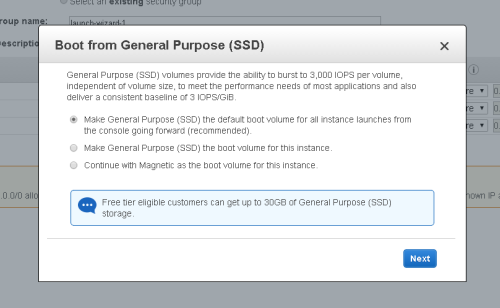
Accept the [x] Make General Purpose (SSD) the default boot volume...
Step 7 - Review
At the next screen you can review your choices before completing the wizard.
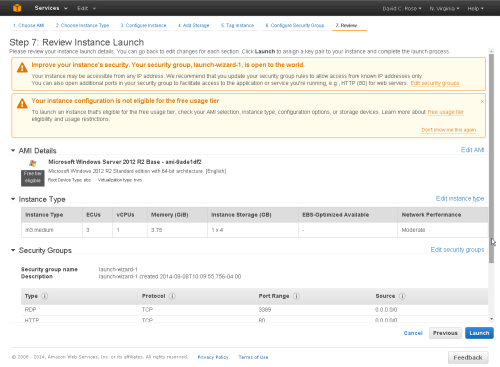
Click the [Launch] button.
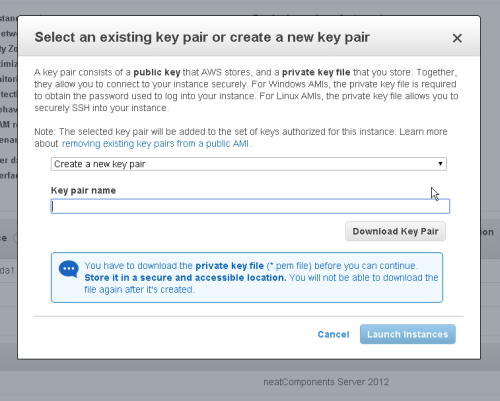
Create Key Pair
At the next screen, select the 'Create a new Key Pair' option and then follow the prompts.
AWS Console EC2-tab
When the wizard completes you will be presented with a view of the AWS console with your instance ready to Connect.
Setting an Elastic IP is discussed below.
Start the Instance
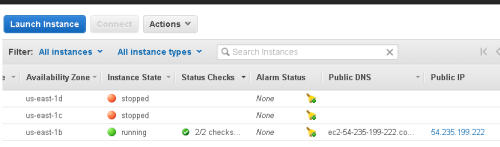
If the Instance is not running - or you are returning to the Console.
Select the Instance, and then from the menu (highlighted above), select 'Launch Instance'.
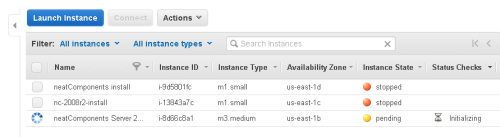
Your new cloud server will start in a few minutes, and when it does the lower part of the screen will be fully populated as shown above, and the Console will report that the Instance is 'running'.
 Stop vs Terminate
When you are finished using your Instance you may either Stop or Terminate.
Stop means 'shut down'. The Instance no longer runs but can be later restarted and will retain your Installations and websites. There will be a small charge by Amazon for retaining the non-running Instance.
Terminate means stop and remove the Instance. All data, Installations and websites will be lost.
You can use the Console 'Actions' - 'Change Termination Protection' to help prevent accidental deletion.
Encrypted Instance
If you are creating a production server that is to be say HIPAA or PCI compliant it will need to have storage that is 'encrypted at rest'.
You should use your newly created instance to create an encrypted instance before installing neatComponents.
Method
At the EC2 Console
In Instances, Select the Instance. Stop the Instance if it is running.
Actions, Image - Create Image. This creates an unencrypted AMI from that Instance. It appears under Images | AMI.
Select the AMI
From [Actions] select 'Copy AMI' and in the following dialog:
Give it a name (e.g. MyInstance-Encrypted) & check the box to [x] Enable encryption.
(Copy and save all ID and login Keys.)
Refresh the AMI page to see the new AMI. The process may take several minutes.
Back to Instances | Instances
Create a new Instance from the [Launch] button.
Important: Select the left tab menu 'MyAMIs' to select what type of instance to launch: not the default tab.
Select the encrypted AMI you just made, and provision as explained above.
You will see as the wizard progresses that the storage for this Instance is now encrypted.
You may then remove any unwanted Instances, AMIs or Snapshots.
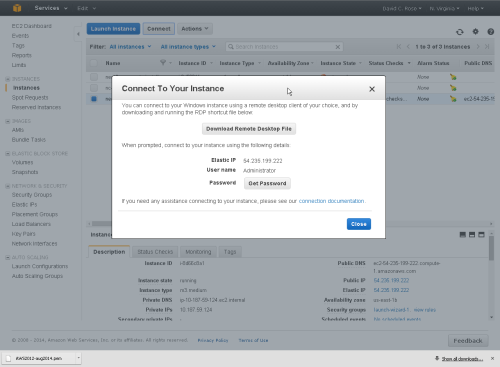
Connect to your started Instance
You can connect to the server using the 'Instance Actions' menu, select 'Connect'. A wizard will hand you through obtaining your password and provide a shortcut to a RDP (Remote Desktop) session.
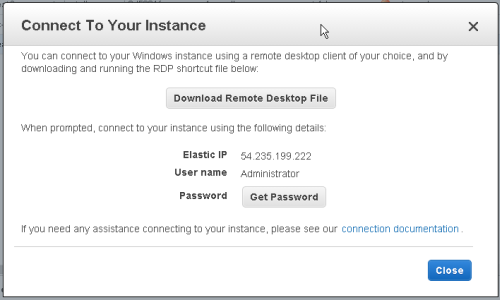
Download the shortcut file, and run it. A Remote Desktop session will start on your new Instance.
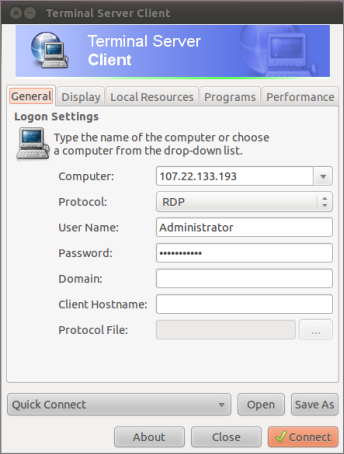
Direct RDP connection
If you do not wish to use the Wizard, or are unable to do so, simply connect using your preferred RDP Client, as shown in the following example. The 'Computer' IP address is explained below:
Log into Windows
Log into Windows with the password you created earlier. You are now at the Windows desktop.
A first time use wizard will ask you if your network use is to be Home - Work - Public. You should choose Work .
Firewall settings in Windows
You should ensure that Port 80 is open.
How to manually set the firewall is explained here...
Install neatComponents
Once you have access to the server you can follow the normal neatComponents installation procedure.
Do be aware that with small Amazon instances, as recommended above, the initial installation (particularly when you add Roles to the server) may take an extended period (an hour or so), during which the server will be running at 100%.
This is caused by Amazon throttling the system to their system limits and changes from time to time.
Understanding AWS IP addresses
When the AWS instance is started it is assigned a Public and a Private IP address. You need to know these so that it is possible to set the DNS for your websites, and to access the server. The AWS console displays these IP addresses in the Instance Description-tab in the lower half of the Console when the Instance is running. Here is a different example:
Public IP Address
It is also the IP address you use to do a manual RDP connection explained above.
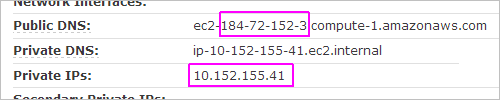
Set the 'A-Record'
You use the Public IP address to set the A-Record in your public DNS records.
In the above example, the Public IP address is 184.72.152.3
This A-record is set at your Domain Registrar - we explain how to do this here...
This is also the IP to set your Hosts file for testing.(read more about Hosts file usage...)
But each time you stop and then restart your instance it will get given a different IP address.
You will need to use an Elastic IP Address to stop the IP addresses changing each time you stop and restart your EC2 instance.
Elastic IP addresses are public static IP addresses that you can map to an instance, and will not change even if you stop and restart the instance.
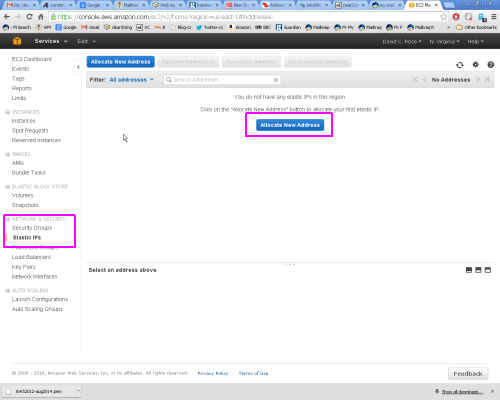
To use an Elastic IP addess you must first ask for an Elastic IP address to be allocated to you, and then map it to your server instance, as detailed below:
You start the process in the 'Network & Security' section of the Console, and then follow the wizard from the 'Allocate New Address' button:
Confirm that you will be using the Elastic IP with an EC2 server. Select EC2, and "Yes, Allocate"

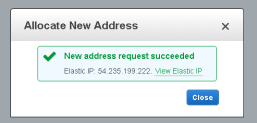
The Elastic IP address is assigned, and listed in the console, however at this stage the Instance ID is blank:

Select the Instance from the available list of running Instances, and click 'Associate'
The instance is now set to use the Elastic IP as it's public IP address.
If you RDP in to the server you will now need to use the Elastic IP address instead of the one allocated to the instance initially. If you are currently connected via RDP the connection will be broken, and you will need to reconnect using the new IP address (use the same password).
Setting your DNS A-Record
When you set DNS A Records to point to sites on your instance, they should be set to the Elastic IP address.
If you are not familiar with setting DNS records we explain it in 'A DNS Primer' here...
Installing and Support In this section |
|
Installing and Support In this section: |
|
Copyright © 2026 Enstar Systems Inc. All rights reserved |