| |
clearString neatComponents
| |
|
clearString neatComponents How to Install |
| Installing | ||
How to Install | ||
neatComponents is a normal Windows installation
It is server software so you must be logged in as the system Administrator.
Administrator privileges
You must have Administrator privileges on the machine.
Be sure you are logged in as Administrator before running the installer.
Internet Explorer - Protected Mode
If IE is running in Protected Mode you will need to adjust it to allow the installation to complete (read how...)
or you may find it more convenient to disable Protected Mode during the installation process (read how...).
Alternatively, install Chrome or Firefox and set that as your default browser.
The installation process is straightforward.
Click the [Run] button, and follow the prompts.
You can see a step by step preview of the Installation method here.
Install neatComponents into the default location, and follow the wizard until the Installation is complete.
Remember you will need to enter the Installation Id.
 You can obtain an Installation ID here if you have not already got one.
Email address and Password
During the installation process you will be asked to enter an email address and create a password - you will use them later to get Administrator access to the Server Manager.
Do not lose this information. For security reasons it cannot be recovered until you have created password recovery below.
The installer will automatically adjust the Windows Features necessary for neatComponents - this can take some time depending on the specification of the machine.
Troubleshooting installation
If you see a message: 'Sorry, neatComponents cannot install ...' that simply means that you need to manually turn-on (enable) some Windows Features - it is explained here. How to make feature adjustments.
"Setup could not verify the integrity of the file Update.inf"
If you see this message, run the "Fix it for me" wizard on this Microsoft KB article.
Installation complete
As the installation completes you will be asked to set a Webmaster Username and Password:
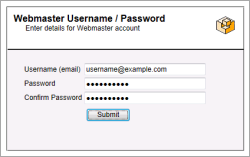
This is the master access password for the system. Make a careful note of the username and password you select as for security reasons you may not be able to recover this password if you forget it.
You should then see the neatComponents Root Web Site 'Server Manager' for your new Installation.
Asking for login
If instead you are asked to login - you will need to ensure your browser is set to accept cookies (new Windows Servers can be locked down by default.) Adding the http://local.neatcomponents.com domain to the Trusted Sites zone solves this:
Internet options / Security tab / Trusted Sites / Sites button, then uncheck 'Require server verification...' and click Add
Getting back to the Server Manager
If you close the 'Server Manager' you can get back to the Root Web Site by going to Windows Start-menu, and selecting Root Web Site from the neatComponents entry.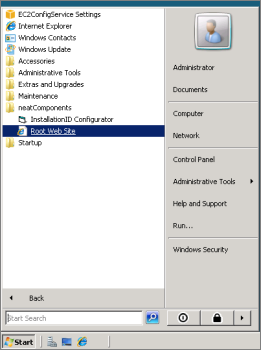
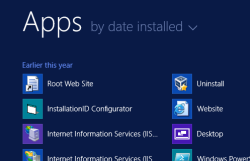
Windows 2012
In Windows 2012 select the Apps view from the Start page (down arrow), and choose 'Root Web Site'
Congratulations - you have successfully installed neatComponents.
Next Steps
Set up Access
If you need assistance in accessing your neatComponents server, or websites that you have created see this section: See Setting up access
Configure the Email Service as soon as possible
Email service
neatComponents makes extensive use of email to transfer data, and also to provide a password recovery service. You should configure the email service promptly after installing neatComponents. See Configuring email
Getting started using neatComponents
Follow the instructions at 'Just installed neatComponents? Read this first:' on the screen shown above and then the Quick Start will guide you through building your first site (click).
Installing and Support In this section |
|
Installing and Support In this section: |
|
Copyright © 2026 Enstar Systems Inc. All rights reserved |