clearString neatComponents
| |
clearString neatComponents
| |
|
clearString neatComponents Data Entry Forms |
| Getting Started | ||
Data Entry Forms | ||
Data Entry Form
Replace the First Page in Section 2 with a Data Entry Form (DEF).
Here's how: delete the Page; add the DEF, rename it to Email Form.
Your Layout Manager should look like this when you are done
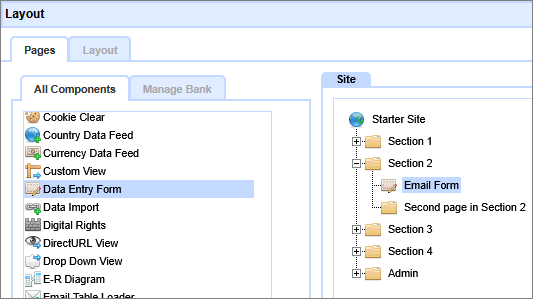
Return to the normal view of the Site, hit the browser Refresh and confirm the navigation has adjusted.
Next, open the Data Entry Form.
You'll see that it is complaining there is no target table set - yet.

Set the target table.
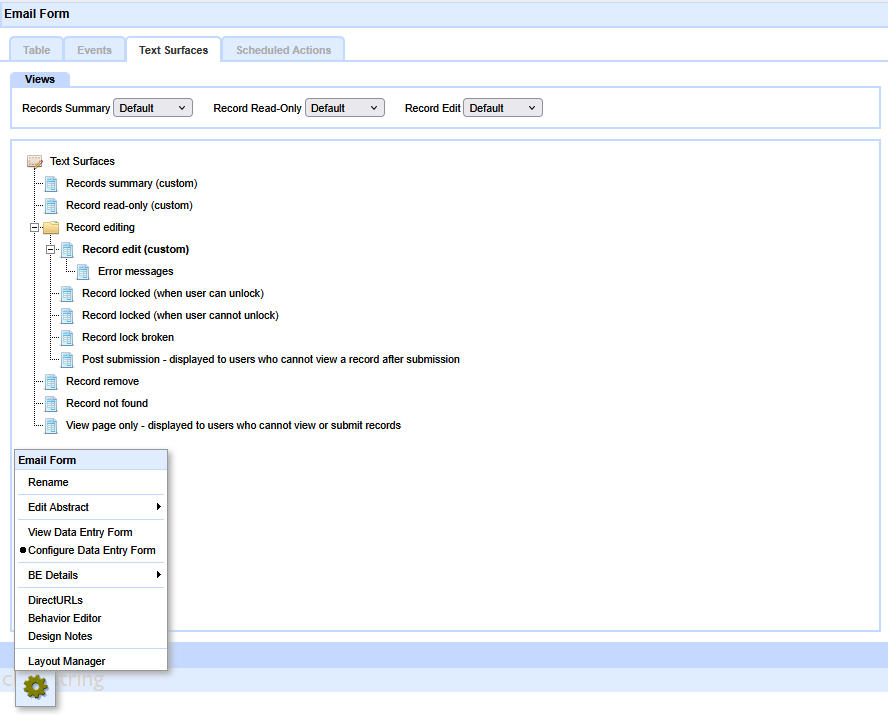
![]()
Mouse-over the Toolbox gear at the bottom of the page to display the menu.
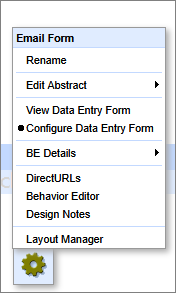
And select 'Configure Data Entry Form'.
Then select the target table for the Data Entry Form. In this case use the 'Email' table you created earlier.
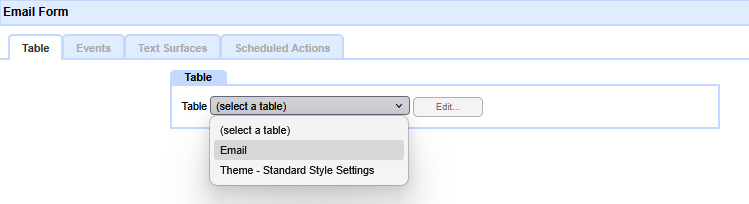
Then click Apply.
Now, use the site navigation tab to browse to the 'Email Form' and you should see:
.png)
Why don't you see a form to complete?
What you are seeing is the app designers view of the summary of all records submitted.
We haven't submitted any forms yet, so there is nothing to display. So, the next step is to enable your Visitors, or app users, to see the form and submit records.
Remember, you are currently logged in as the designer, however your visitors will not be logged in, so we need to give them permission to see the DEF and submit records.
Post Submission Response
After your Visitor clicks the submit button their record will be appended to the Table you set up. But what does the Visitor see?
Set the DEF, using the Behavior Editor from the gear/toolbox, Settings | Options, to redirect the Visitor to a specific page in the app where you can thank them for their submission and give them confidence that something has happened when they clicked submit.
.png)
For this Tutorial, rename the 'Second Page in Section 2' to 'Confirmation' (go to that page; select the gear/toolbox; Rename) and then return to the DEF and set the Redirect target using the picker in the DEF behavior Editor. On the Renamed 'Confirmation' page enter some suitable 'Thank You' text of your choice. Finally, open the Layout Manager and set the renamed 'Confirmation' page to Hidden, so it does not show up in the navigation in the ordinary way.
Tip:
Advanced post-submission actions are discussed Below the Line.
Introducing Permissions
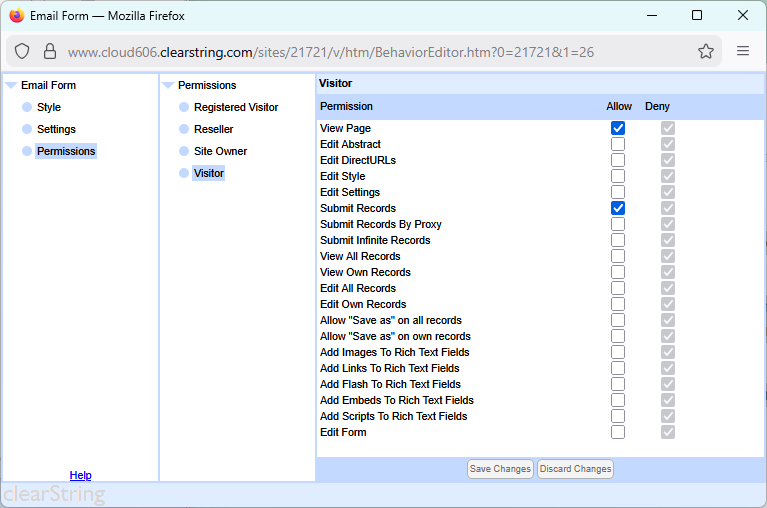
Most 'advanced' components, such as a DEF, are hidden from visitors by default, so we'll need to change the View and Submit Permissions on this Table so that you can try it out as a pretend visitor to the site.
So, in the Behavior Editor. Select Permissions from the left-panel - then select Visitor. Set the 'View Page' and 'Submit Records' checkboxes to 'Allow' and [Save Changes]. Close the Behavior Editor.
Viewing as a Visitor
To see the form as a website visitor will see it you will need to log-out at the Admin section of the website - and then select the Table-tab.
Tip:
A more convenient alternative to logging out is to use a new 'incognito' or 'private viewing' window of your browser, or use a different browser.
So construct using Chrome, and visit using Firefox, etc.
When viewed as a visitor (not logged in - check you can't see the gear at the bottom-left of the window) your form should look similar to this:

You can try it out - make two or three useful submissions (we'll need them later) as a Visitor - then log back in and return to the Form. Each time you make a submission you should be taken back to the 'front page'.
.png)
You will now see those records listed - neat, huh?
You will remember that when we set-up the Form we said: "Set the Record Identifier | Field to Last Name" - so the results are shown in Last Name order.
![]() Now, let's see how to get the information collected by the Form emailed out...
Now, let's see how to get the information collected by the Form emailed out...
Below the line
Permissions
Security is important. neatComponents ensures that there is a solid security system behind every app.
Security is a very wide topic, and influences system design and programming throughout, ensuring that there are no weak points within the system. The security is most obvious where it meets the administrator, and the visitor to the site.
The system manages security through the concepts of usergroups and permissions. There are some built-in usergroups that all sites have, but there is no limit to the number of extra usergroups that can be created for specific classes of visitor.
Read more about Site Security - users and permissions here...
Form Customization
At this stage of the Tutorial we are using a simple default view of the Data Entry Form submission surface.
Later in the Tutorial we will examine basic customization.
Post Submission Surfaces
The DEF does provide a series of default surfaces that can be configured with responses covering a range of common scenarios.
How these Views and their contents are viewed are determined by the Permissions set, so you need to be aware that the app designer is usually seeing different content than the Visitor. As you come to use these Surfaces in your designs remember to monitor progress in a Private/Incognito session, or in a different browser, so you can impersonate a Visitor to the app as you work.
More control than the Defaults
Extended logic is managed by 'reverting' to the simple 'redirect after submission' model, but then using that surface as a jumping off point for responses and sequencing of your own construction.
Creating your first app In this section |
|
Creating your first app
We learn how to add a basic DEF (Data Entry Form). In this section: |
|
 What are we learning here?
Copyright © 2026 Enstar Systems Inc. All rights reserved |