 |    | |
|
|

H:Working with Legacy Windows
neatComponents installs onto current versions of Windows and enables you to create and host multiple websites on your own computer and serve those sites - within the limitations of Microsoft's licensing.
Microsoft limit Windows XP Pro users to serving only one website at a time.
neatComponents allows you to create and host as many sites as you wish, but you must decide which one you wish to serve. You can switch sites from time to time, as explained below, but only one site can respond to page requests at any given time.
More recent editions of Windows, such as Windows 7, do not have this limitation.
Installing onto XP Pro
You must first enable the Windows IIS component, and then run the Installer (download).
If you run the Installer and get an error message saying that IIS must be enabled, simply complete the task below, and then run the Installer again.
Enable IIS
Open the Control Panel, select 'Add or Remove Programs', and when the dialog opens select from the left-menu 'Add/Remove Windows Components'. Select 'Internet Information Services (IIS), and then click the [Next] button to complete the Wizard.
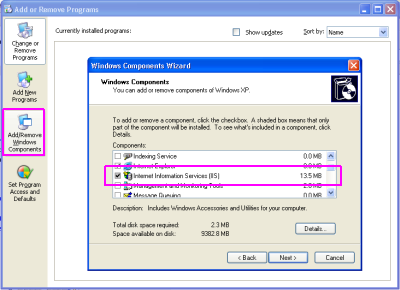
Working with XP Pro
Enable the website
When you first install neatComponents it will present you with the Server Manager (you can get back to this screen at http://local.neatcomponents.com) where you manage the hosting and creation of your websites.
To enable your new or selected site to respond to page requests enter the Domain information.
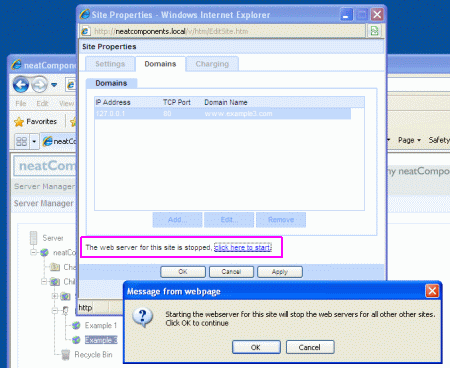
Then click the link (highlighted above) and then confirm with [OK] to start the site.
Switching Sites
Once you start the web server for your site of choice you will lose access to the Server Manager site itself - due to the Microsoft license limitation.
To switch to another site you must first restart the Server Manager site by browsing to /servermanager.
The URL for this example would be: http://www.example3.com/servermanager
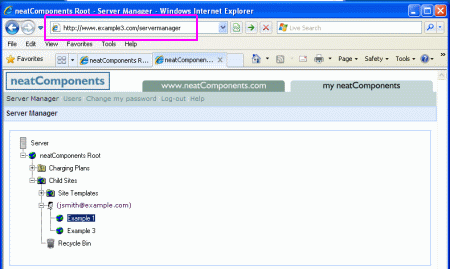
Choose the site you want to switch to, then (right-click) and select the Properties of the site.
... and in the Domains-tab, select 'click here to start' and confirm.
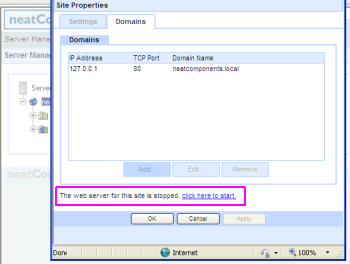
The current website will be stopped and the chosen site will be enabled.
Click the link offered in the dialog below to access the Server Manager again.
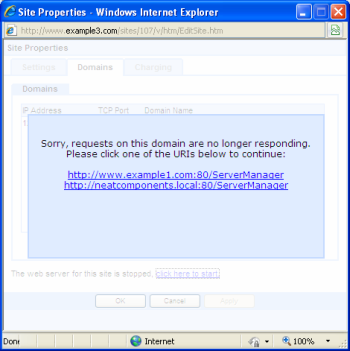
This will return you to the Server Manager - now accessed from the 'new' site.
Copyright © 2026 Enstar Systems Inc. All rights reserved |
| | |